Content Studio makes marketing images from the products already in your catalog: a floor in a furnished living room, a tile on a styled backdrop, a portrait version for Stories. You work on a canvas, you see every image before it is used, and you can ask the Studio Agent to plan a set of images for you.
What you will set up: a project, a first set of images for one product, and a scheduled post from an image you approve.
How long it takes: about 15 minutes for your first project. Each image takes under a minute to generate.
What you need before you start
- At least one product in your catalog with a good image. If your catalog is empty, start with our guide to importing a catalog.
- AI credits. Your remaining credits are shown at the top of Content Studio and on every recipe's Generate button, so you always see the cost first.
- For the last step, a social account connected in the Social section of the Marketing workspace, if you want to schedule posts.
Step 1: Open Content Studio and create a project
Open the workspace switcher at the top left, choose Marketing, then go to Content › Content Studio. You see your projects as cards, each with a preview of its canvas, the number of nodes and the date it was last changed. Your credits are shown next to the New project button.
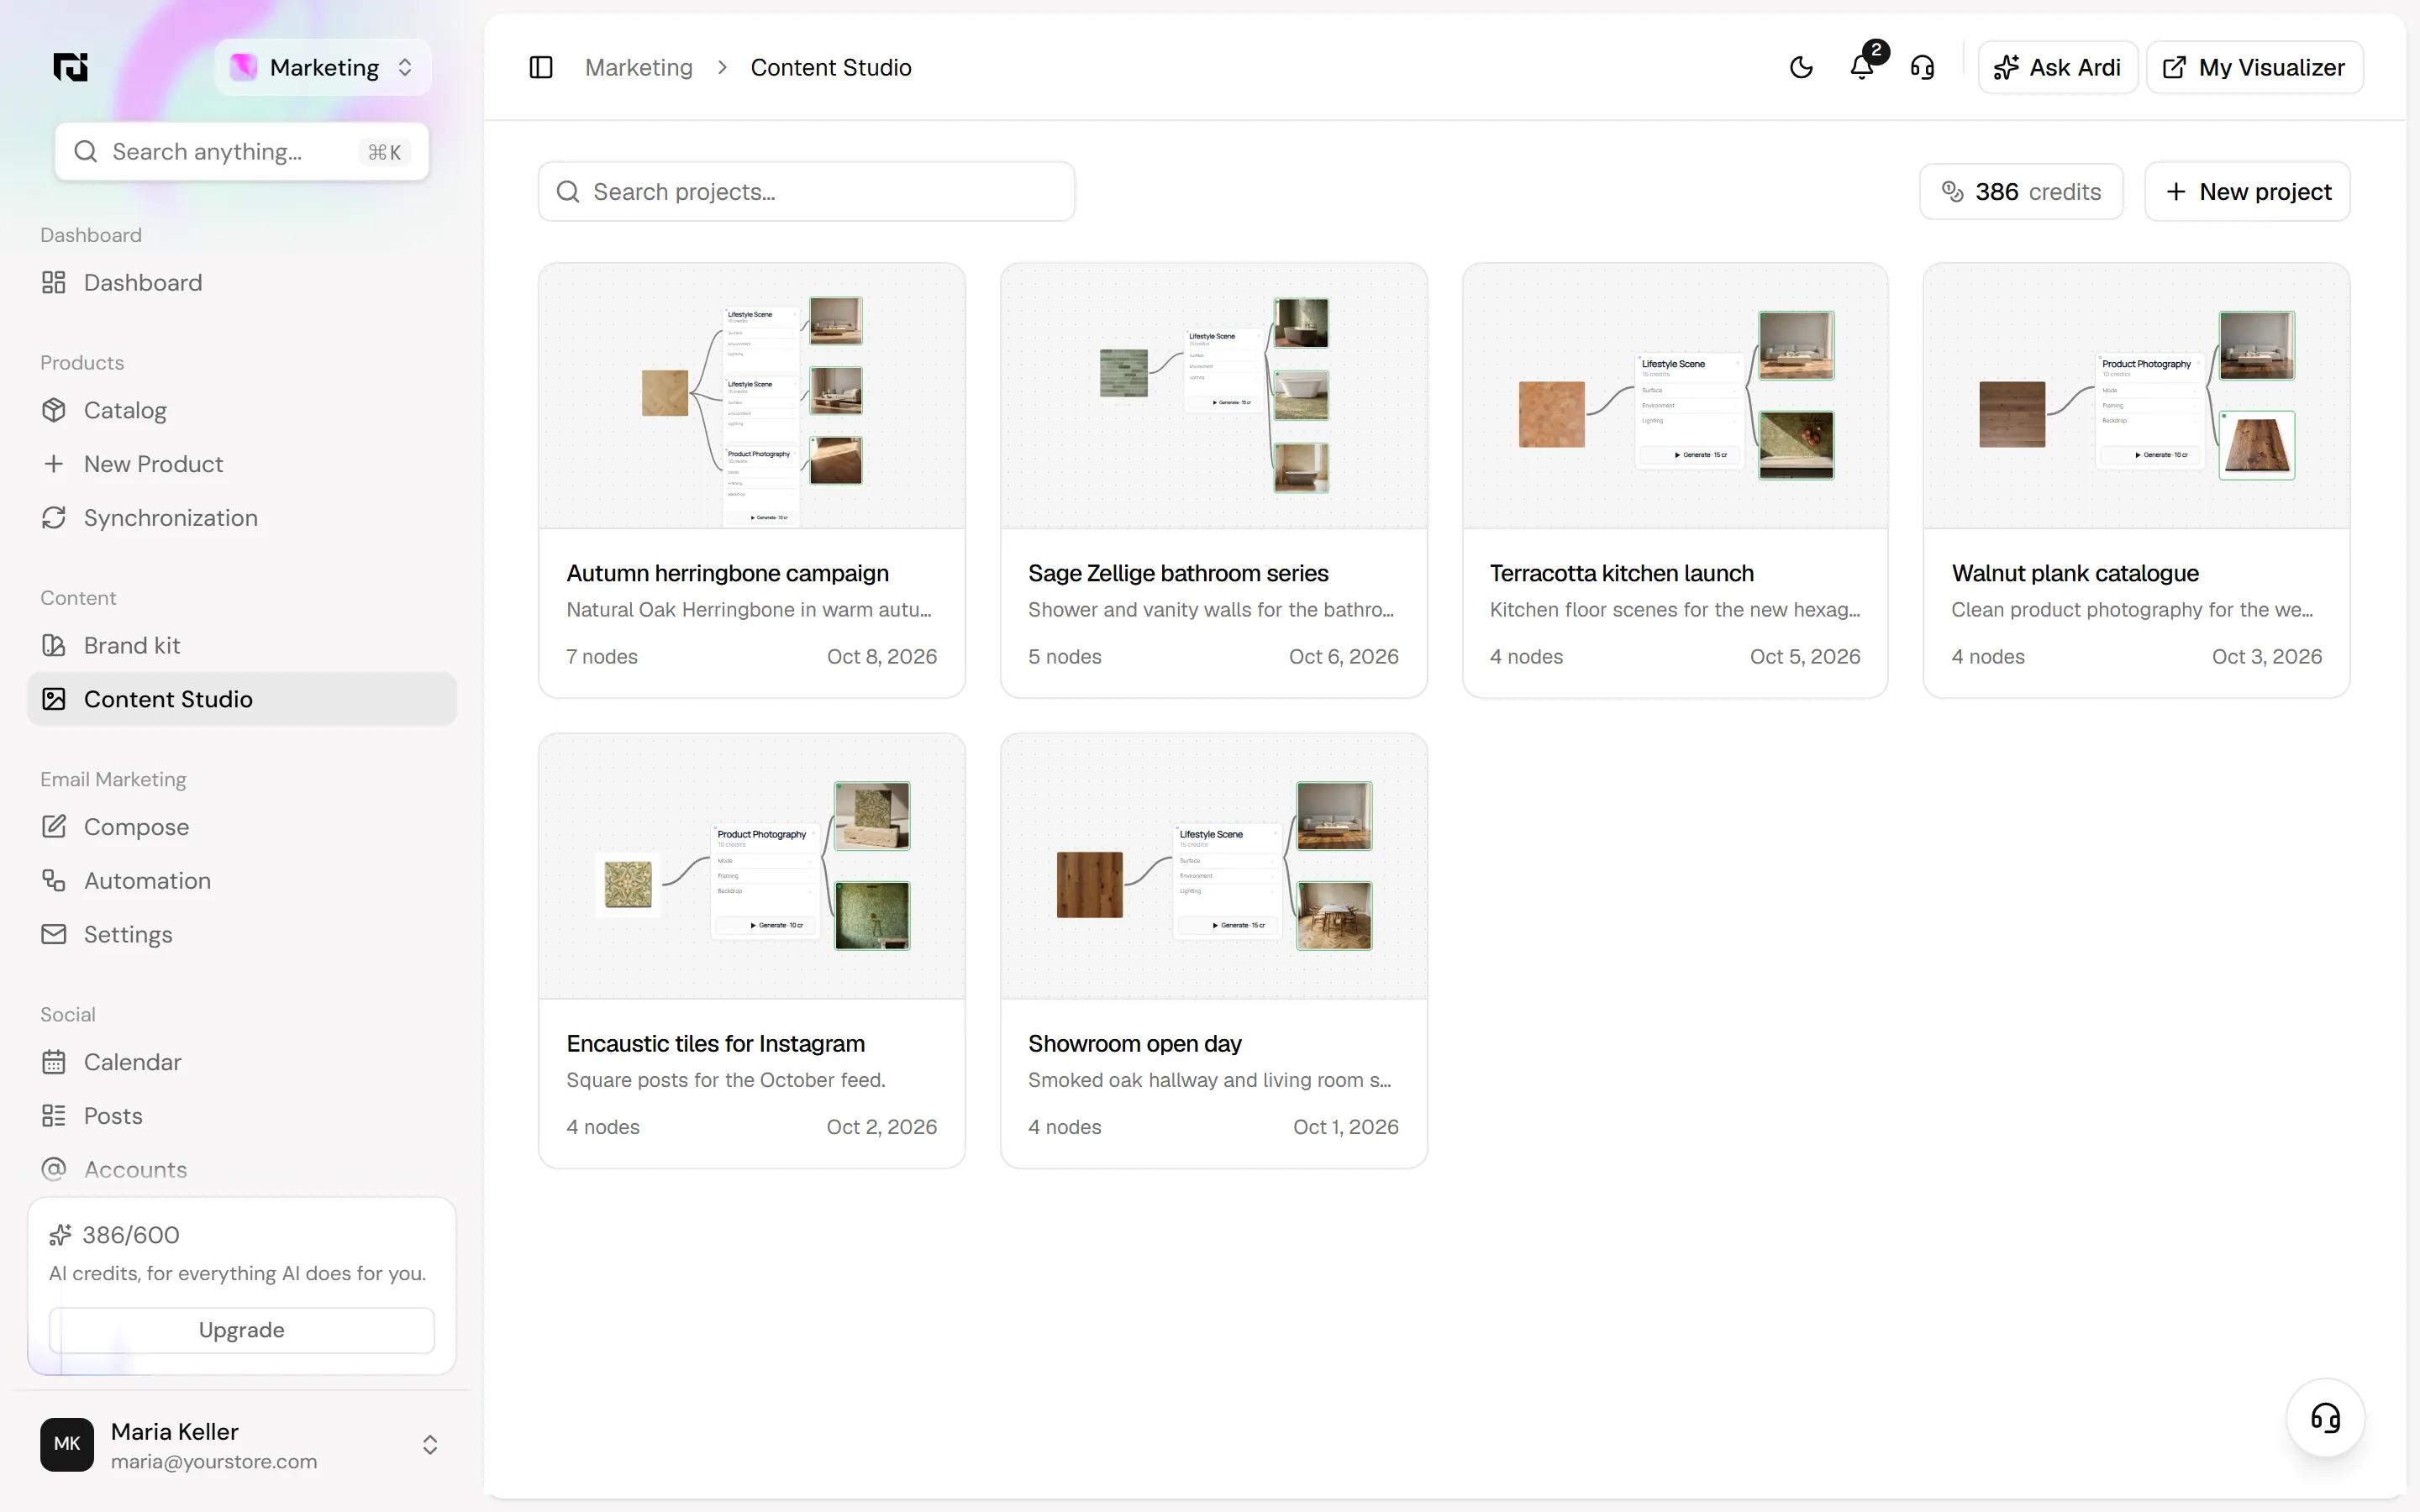
Click New project, give it a name and a short description, and confirm. A clear name, such as "Autumn herringbone campaign", makes the project easy to find again. You land on the new project's canvas.
Step 2: Add a product to the canvas
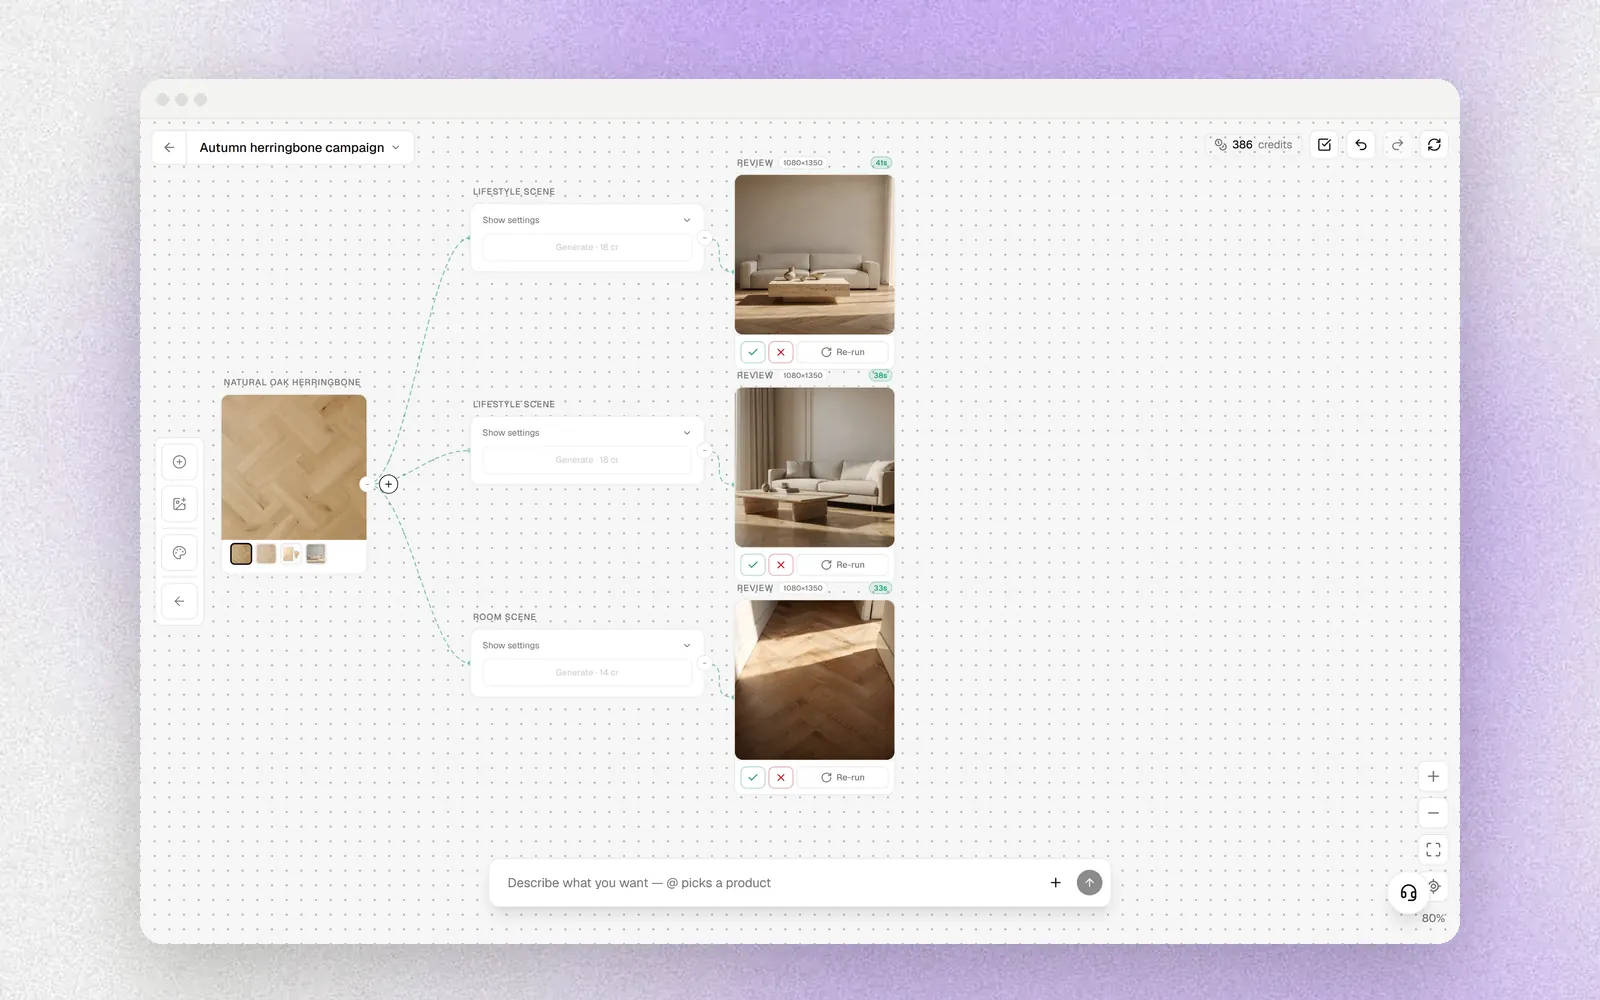
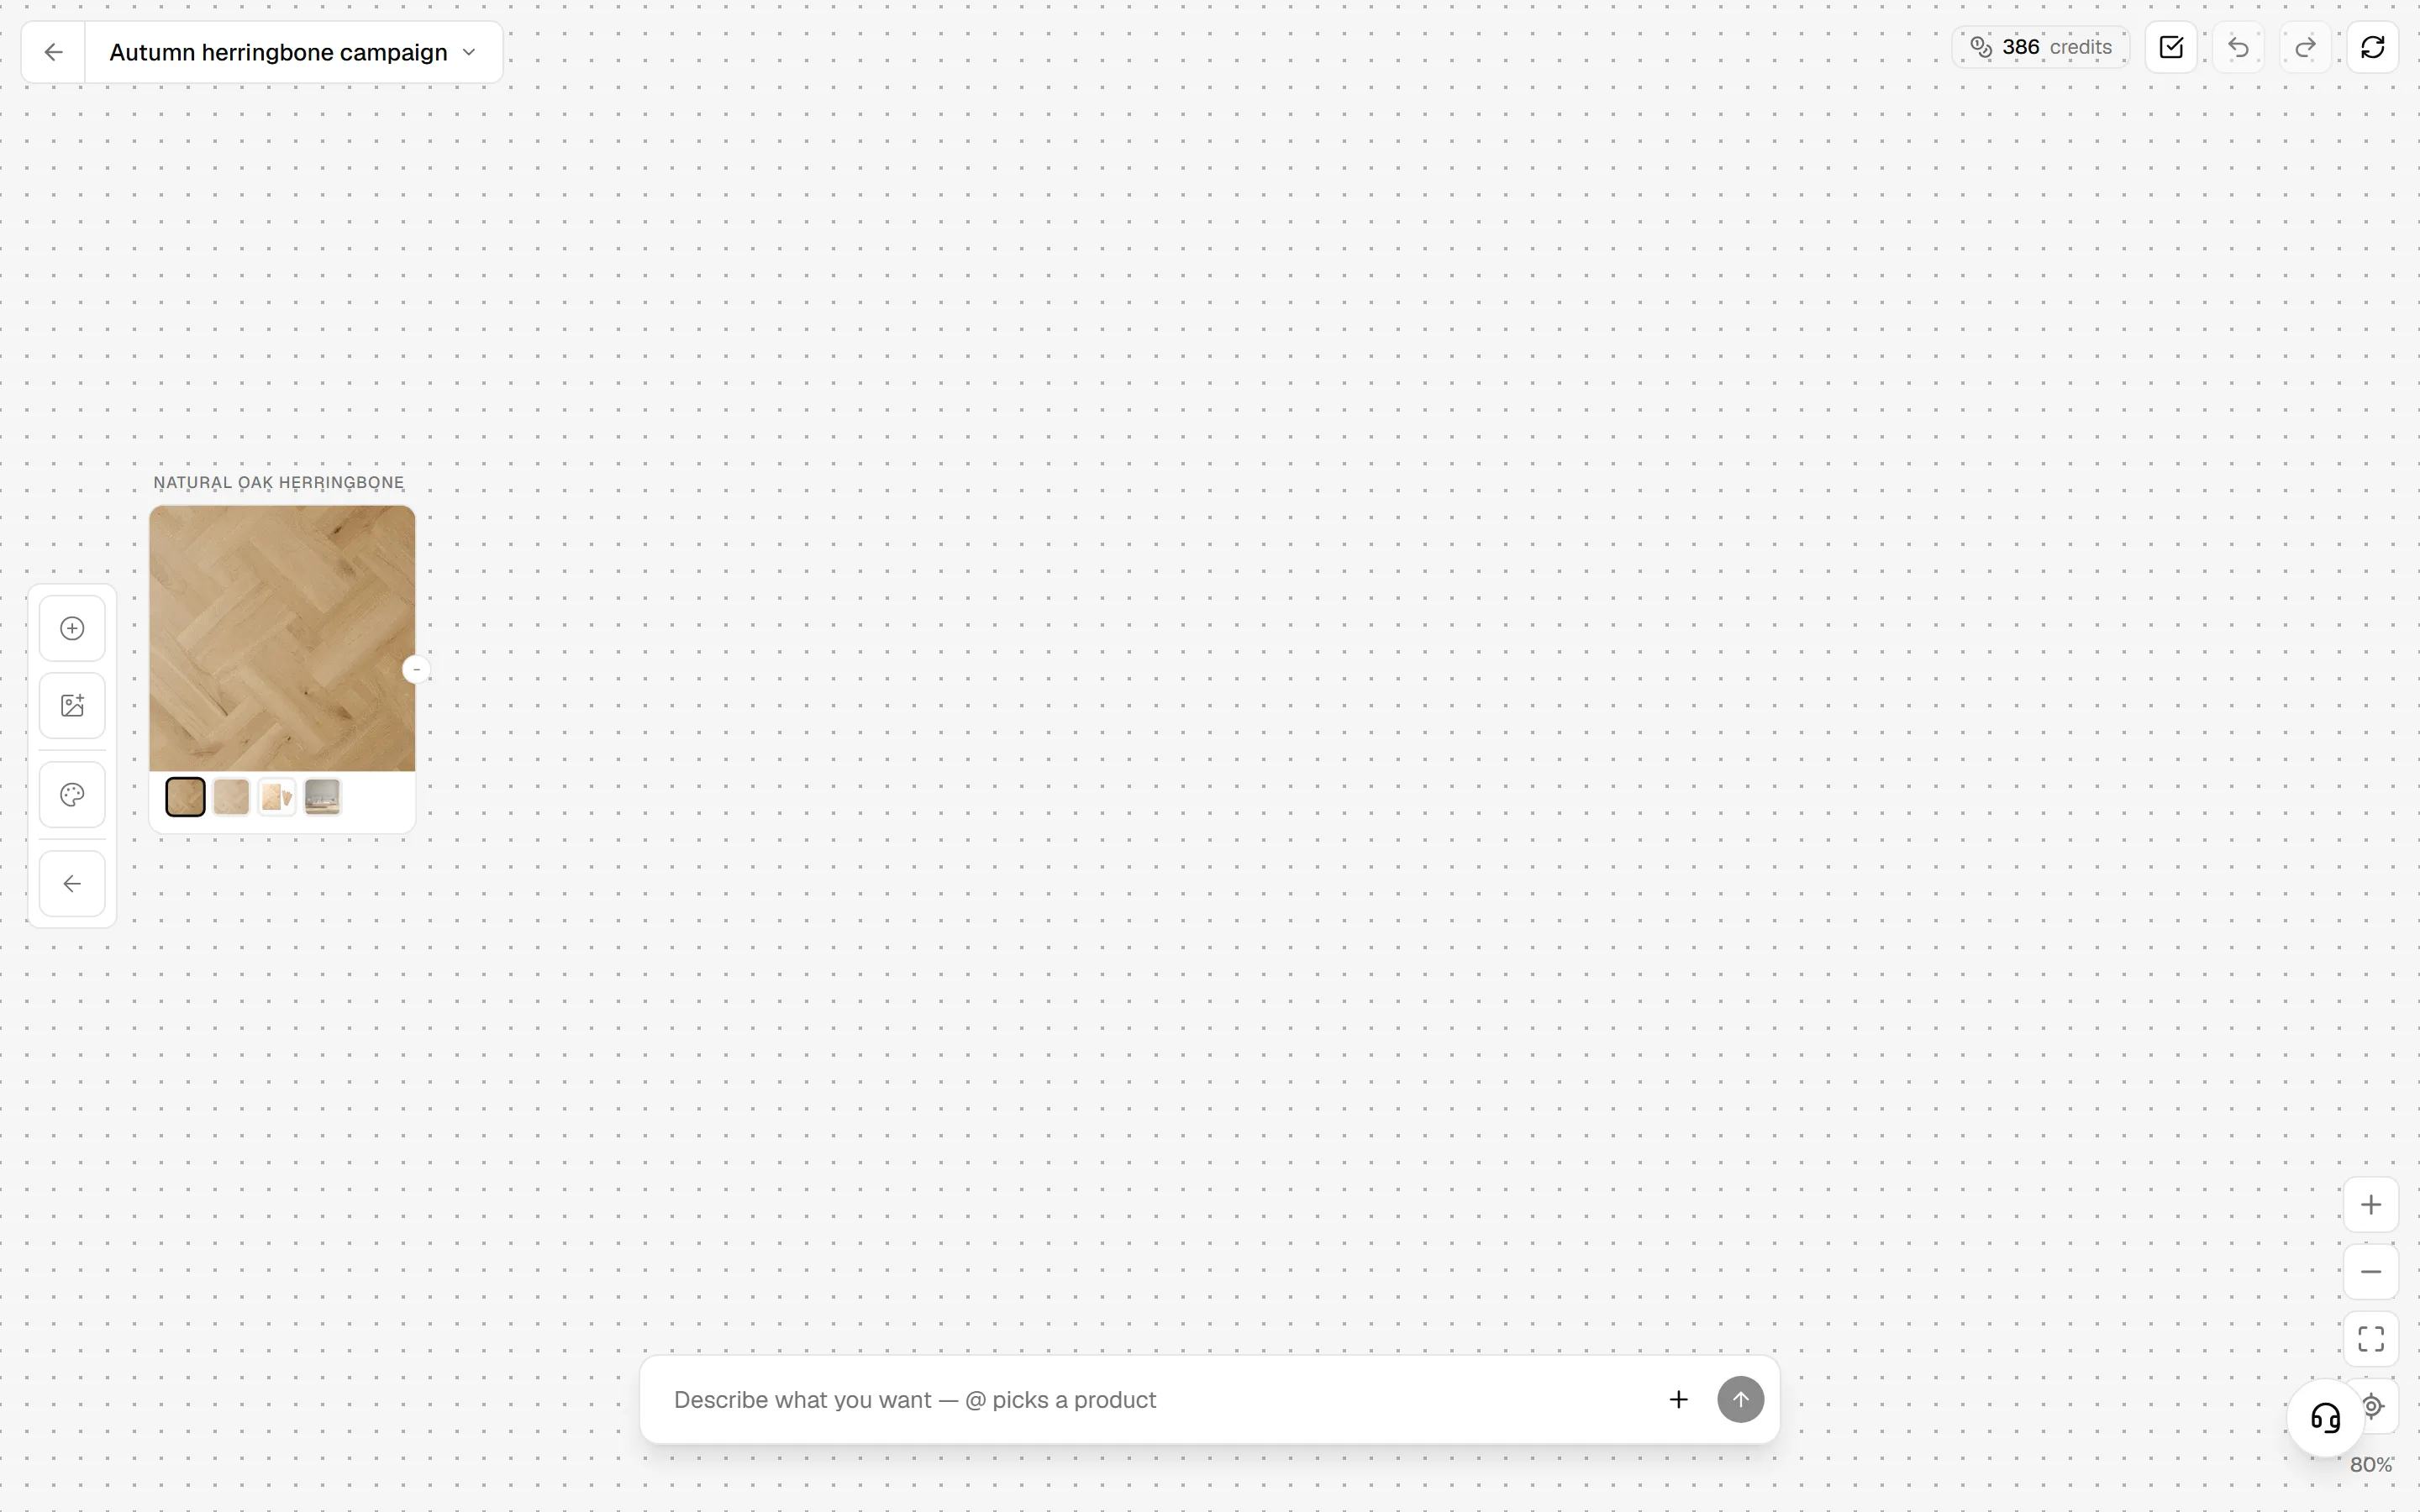
Use the tool bar on the left of the canvas to add products from your catalog. Each product appears as a node with its name, its main image and its gallery thumbnails.
Step 3: Choose a recipe
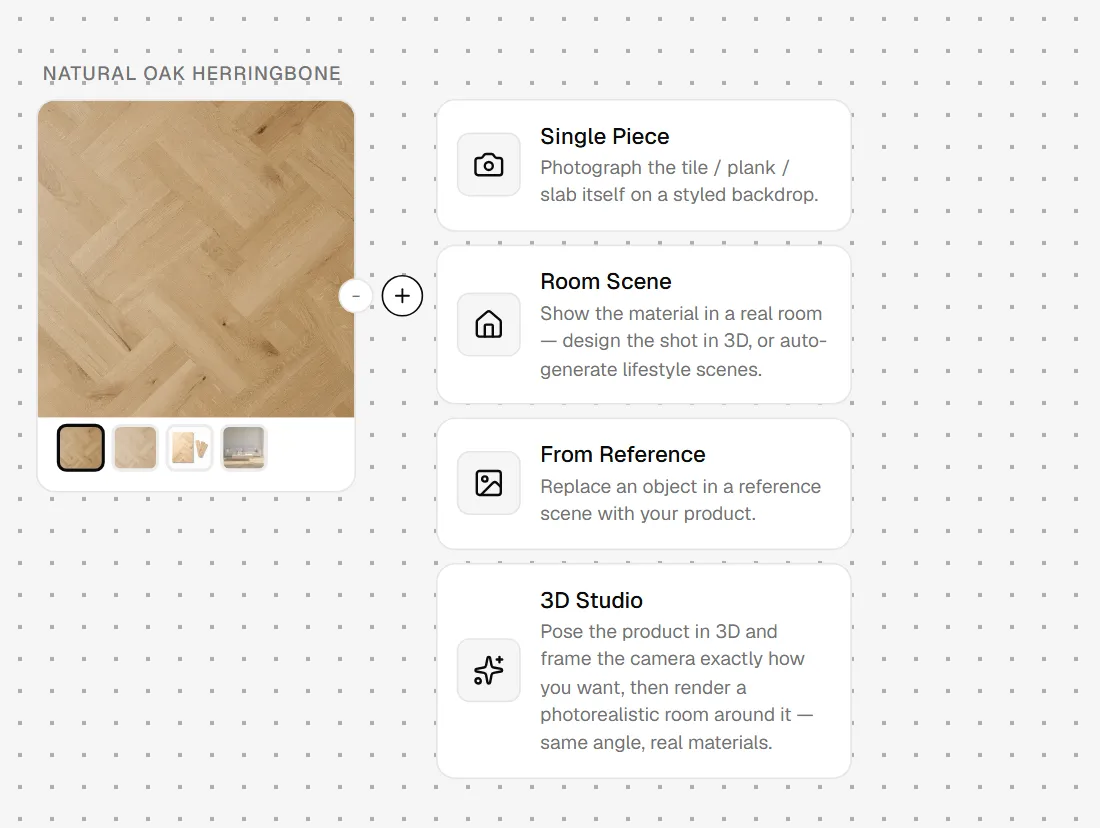
A recipe is a type of image. Hover over the product node and click the + on its right edge, or right-click the node and choose Add recipe. The recipe picker shows the recipes that fit the product. For a floor product they are:
- Single Piece: photograph the tile, plank or slab itself on a styled backdrop.
- Room Scene: show the material in a real room, either designed in 3D or as generated lifestyle scenes.
- From Reference: replace an object in a reference scene with your product.
- 3D Studio: pose the product in 3D and frame the camera, then render a room around it.
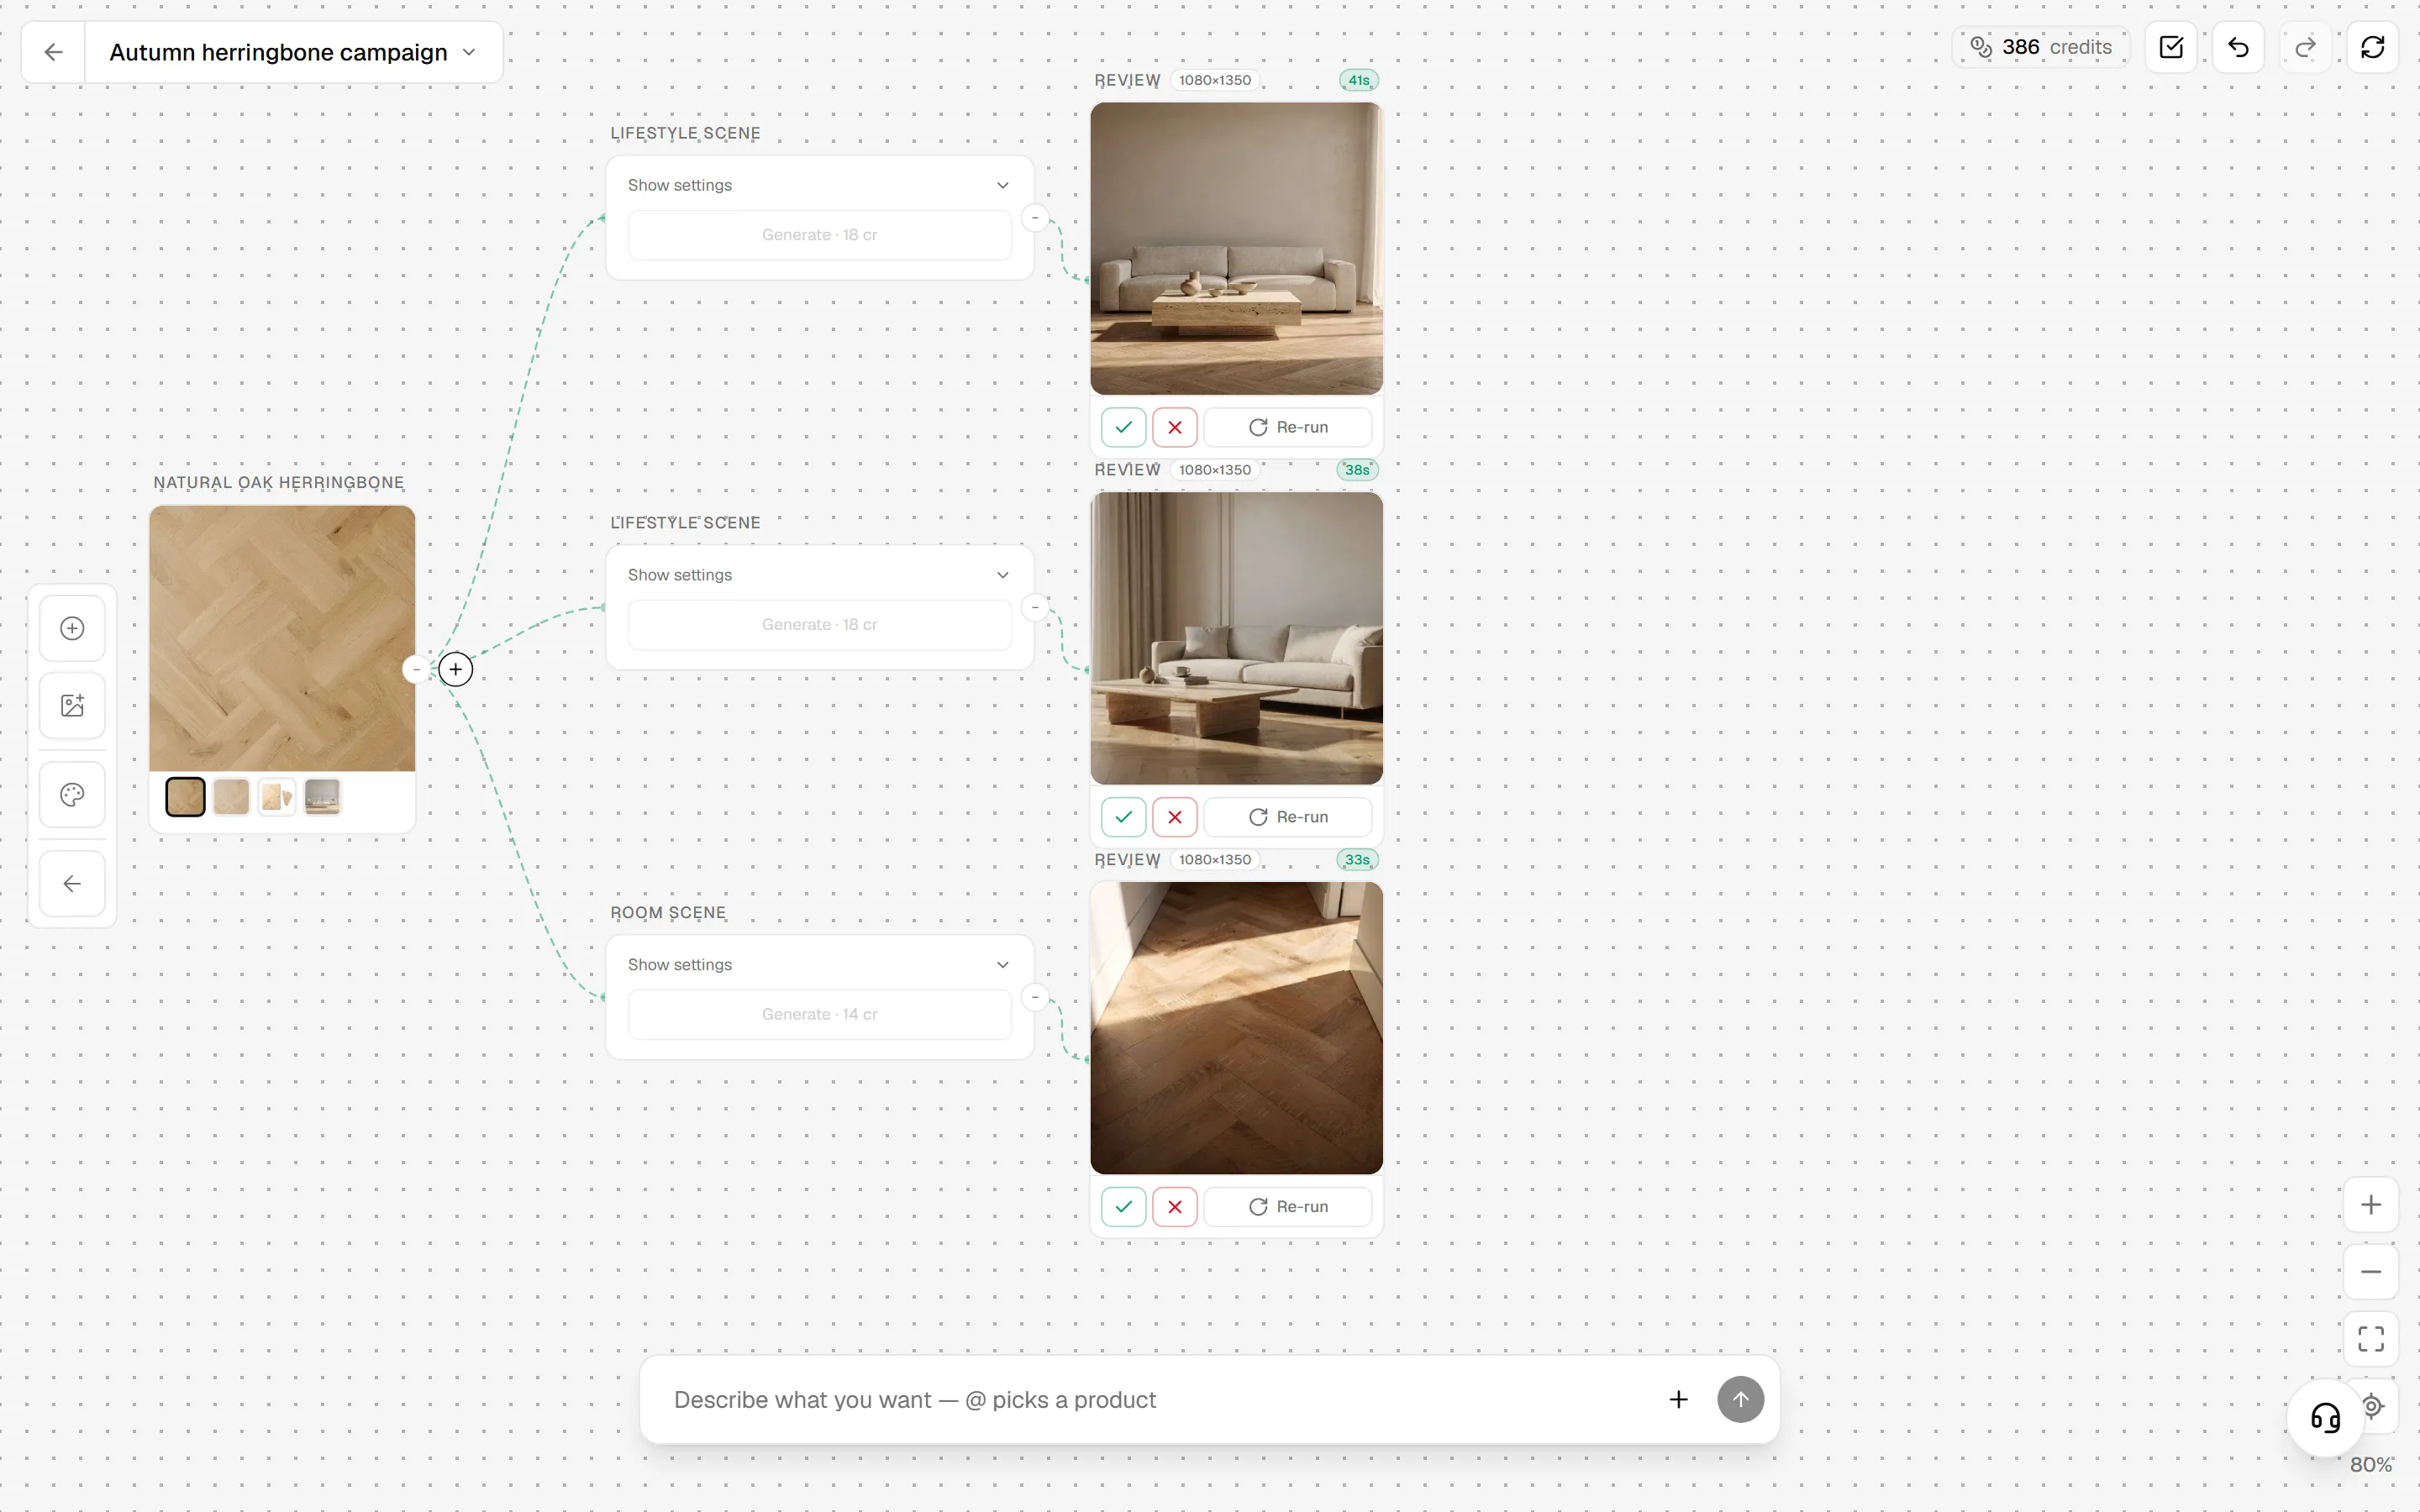
The recipe node appears on the canvas, labelled with what it makes, for example LIFESTYLE SCENE. Click Show settings to adjust it, then click Generate. The button shows the credit cost before you click, for example "Generate · 18 cr".
Step 4: Review each image
Each new image arrives on the canvas next to its recipe, labelled REVIEW, with its size and how long it took. Under it are three buttons:
- Approve (check mark) keeps the image.
- Reject (cross) discards it.
- Re-run makes a new version with the same settings.
Look at each image at full size before you approve it. Check that the product looks right: the color, the pattern and the scale of the boards or tiles.
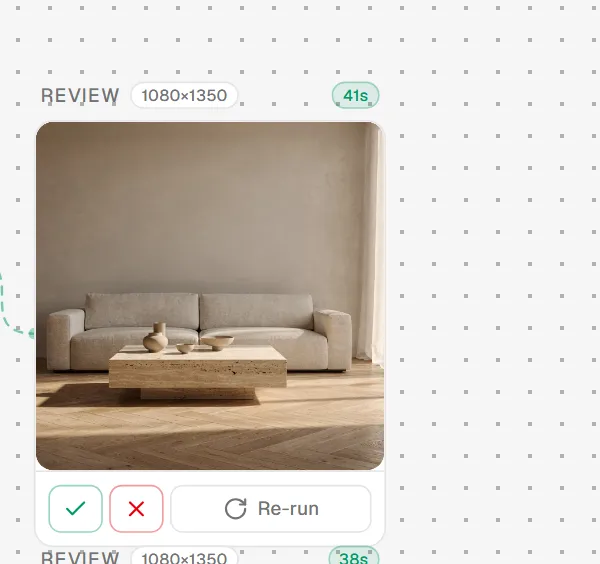
An approved image is labelled IMAGE and gets its own + handle, so you can build on it with a variation, an edit, a design or a video.
Step 5: Schedule an approved image as a post
Hover over an approved image. Four round buttons appear under it: Download, Schedule as post (the calendar icon), Ask the agent about this, and Remove. Hover over a button to see its name.
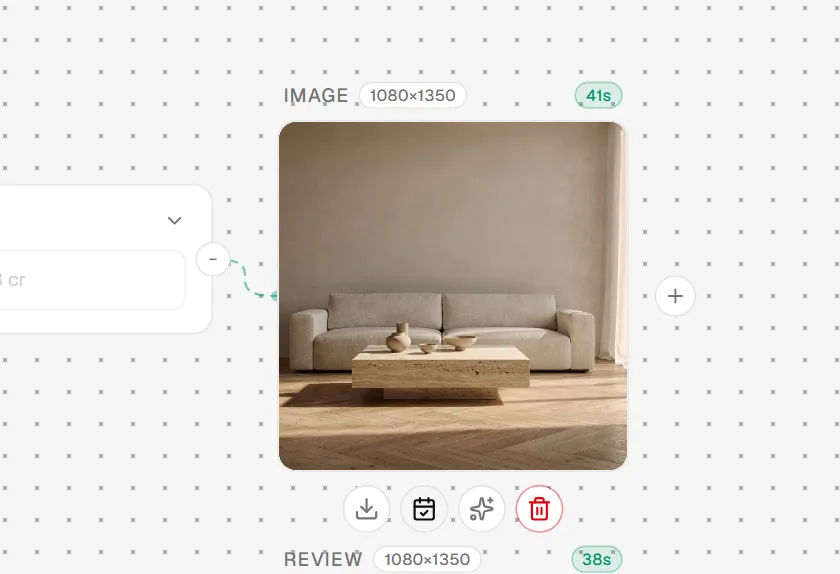
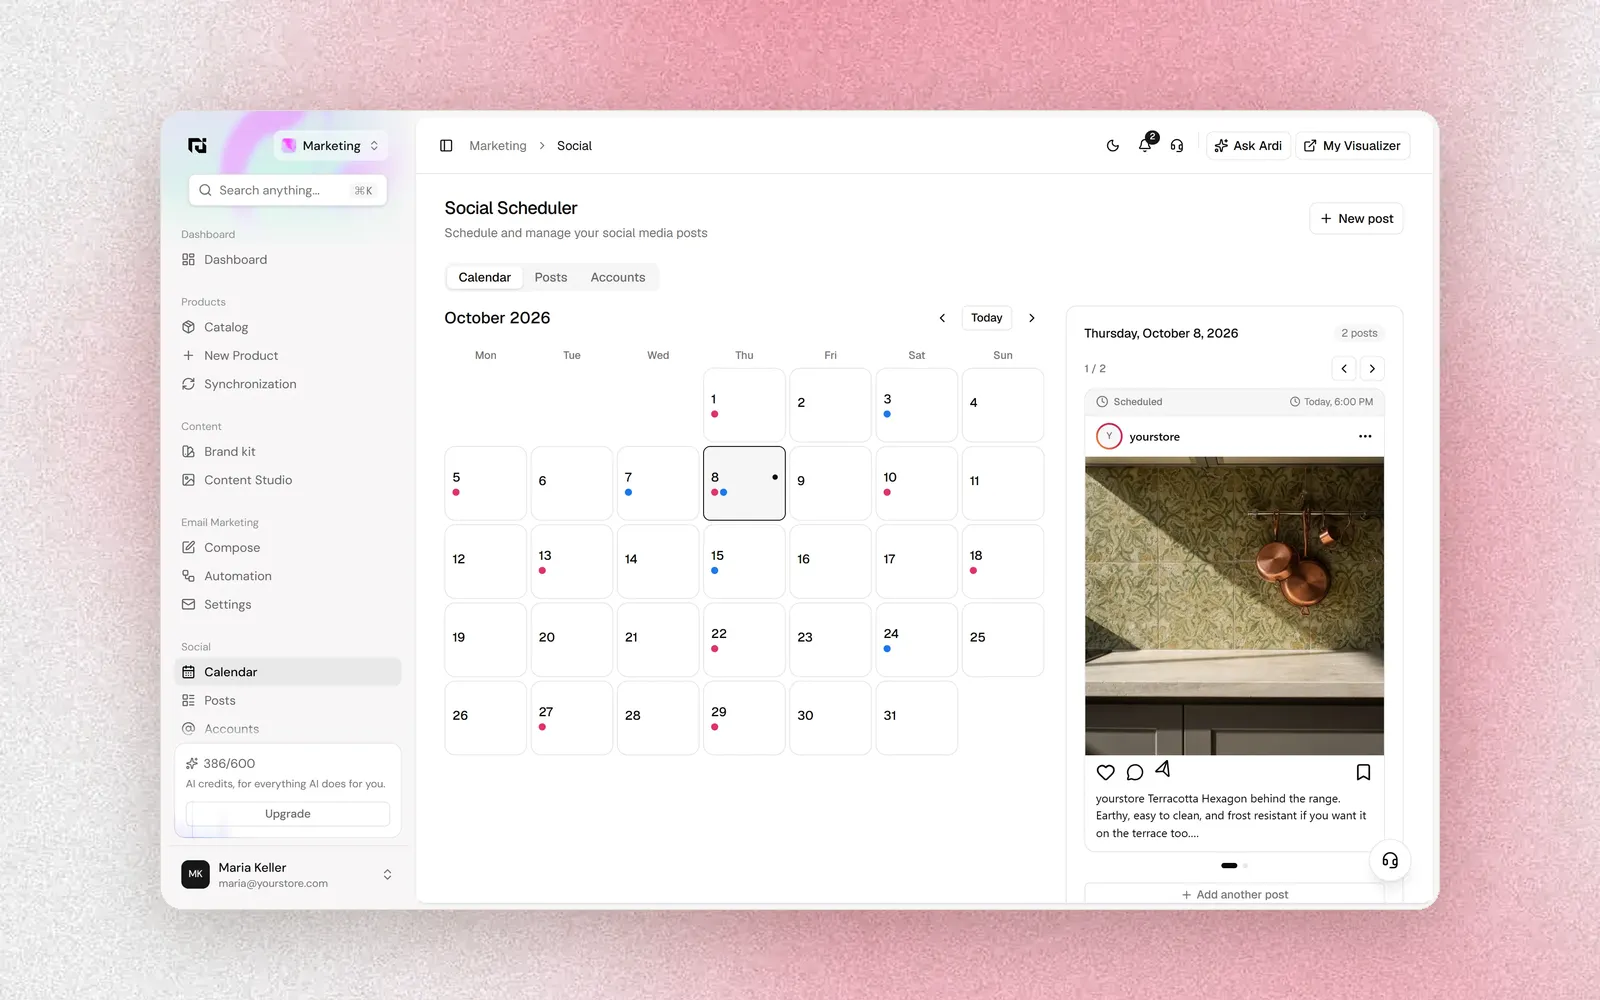
Click Schedule as post. The social scheduler's composer opens with the image already selected, so you only need to finish the post and schedule it.
Step 6: Ask the Studio Agent to plan images for you
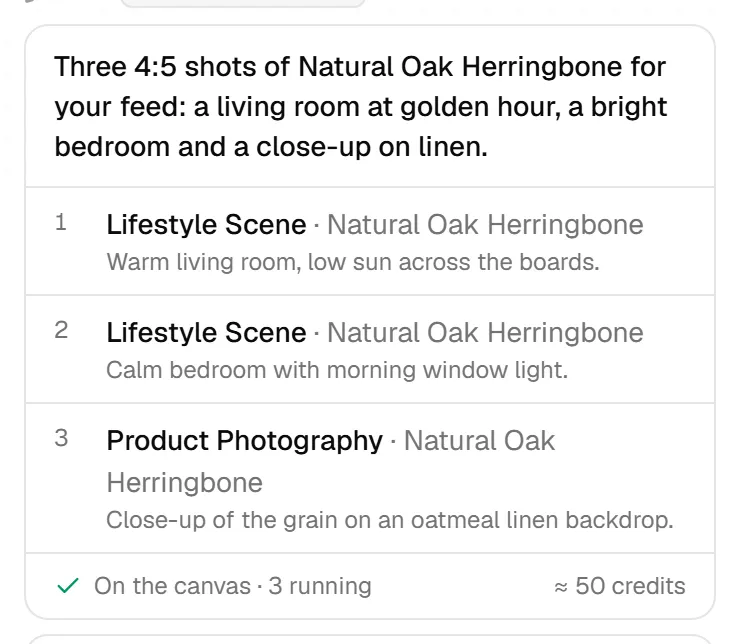
Instead of adding recipes yourself, you can describe what you want in the bar at the bottom of the canvas. Type @ to pick a product by name. For example: "Three 4:5 shots of @Natural Oak Herringbone for our feed: a living room, a bedroom and a close-up."
The Studio Agent panel opens on the right. Its conversations are kept as tabs, with + for a new conversation and the clock icon for your chat history. In the composer you can turn Thinking on or off, use Pick from canvas to point at nodes, and choose how much the agent may do on its own: Ask first or Auto.
With Ask first, the agent proposes a plan and waits. The plan shows what it will make (for example "Image ×2"), its summary, the recipe and format, and an estimate of the credits it will use.
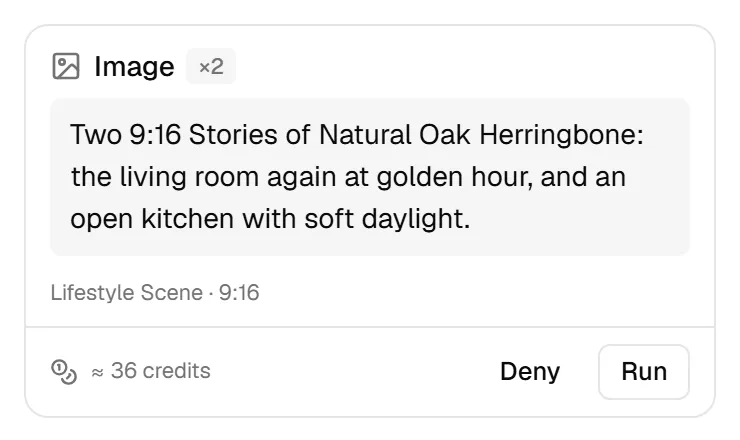
Click Run to approve it and generate, or Deny to turn it down. When a plan only rearranges the canvas without generating anything, the button reads Apply instead of Run.
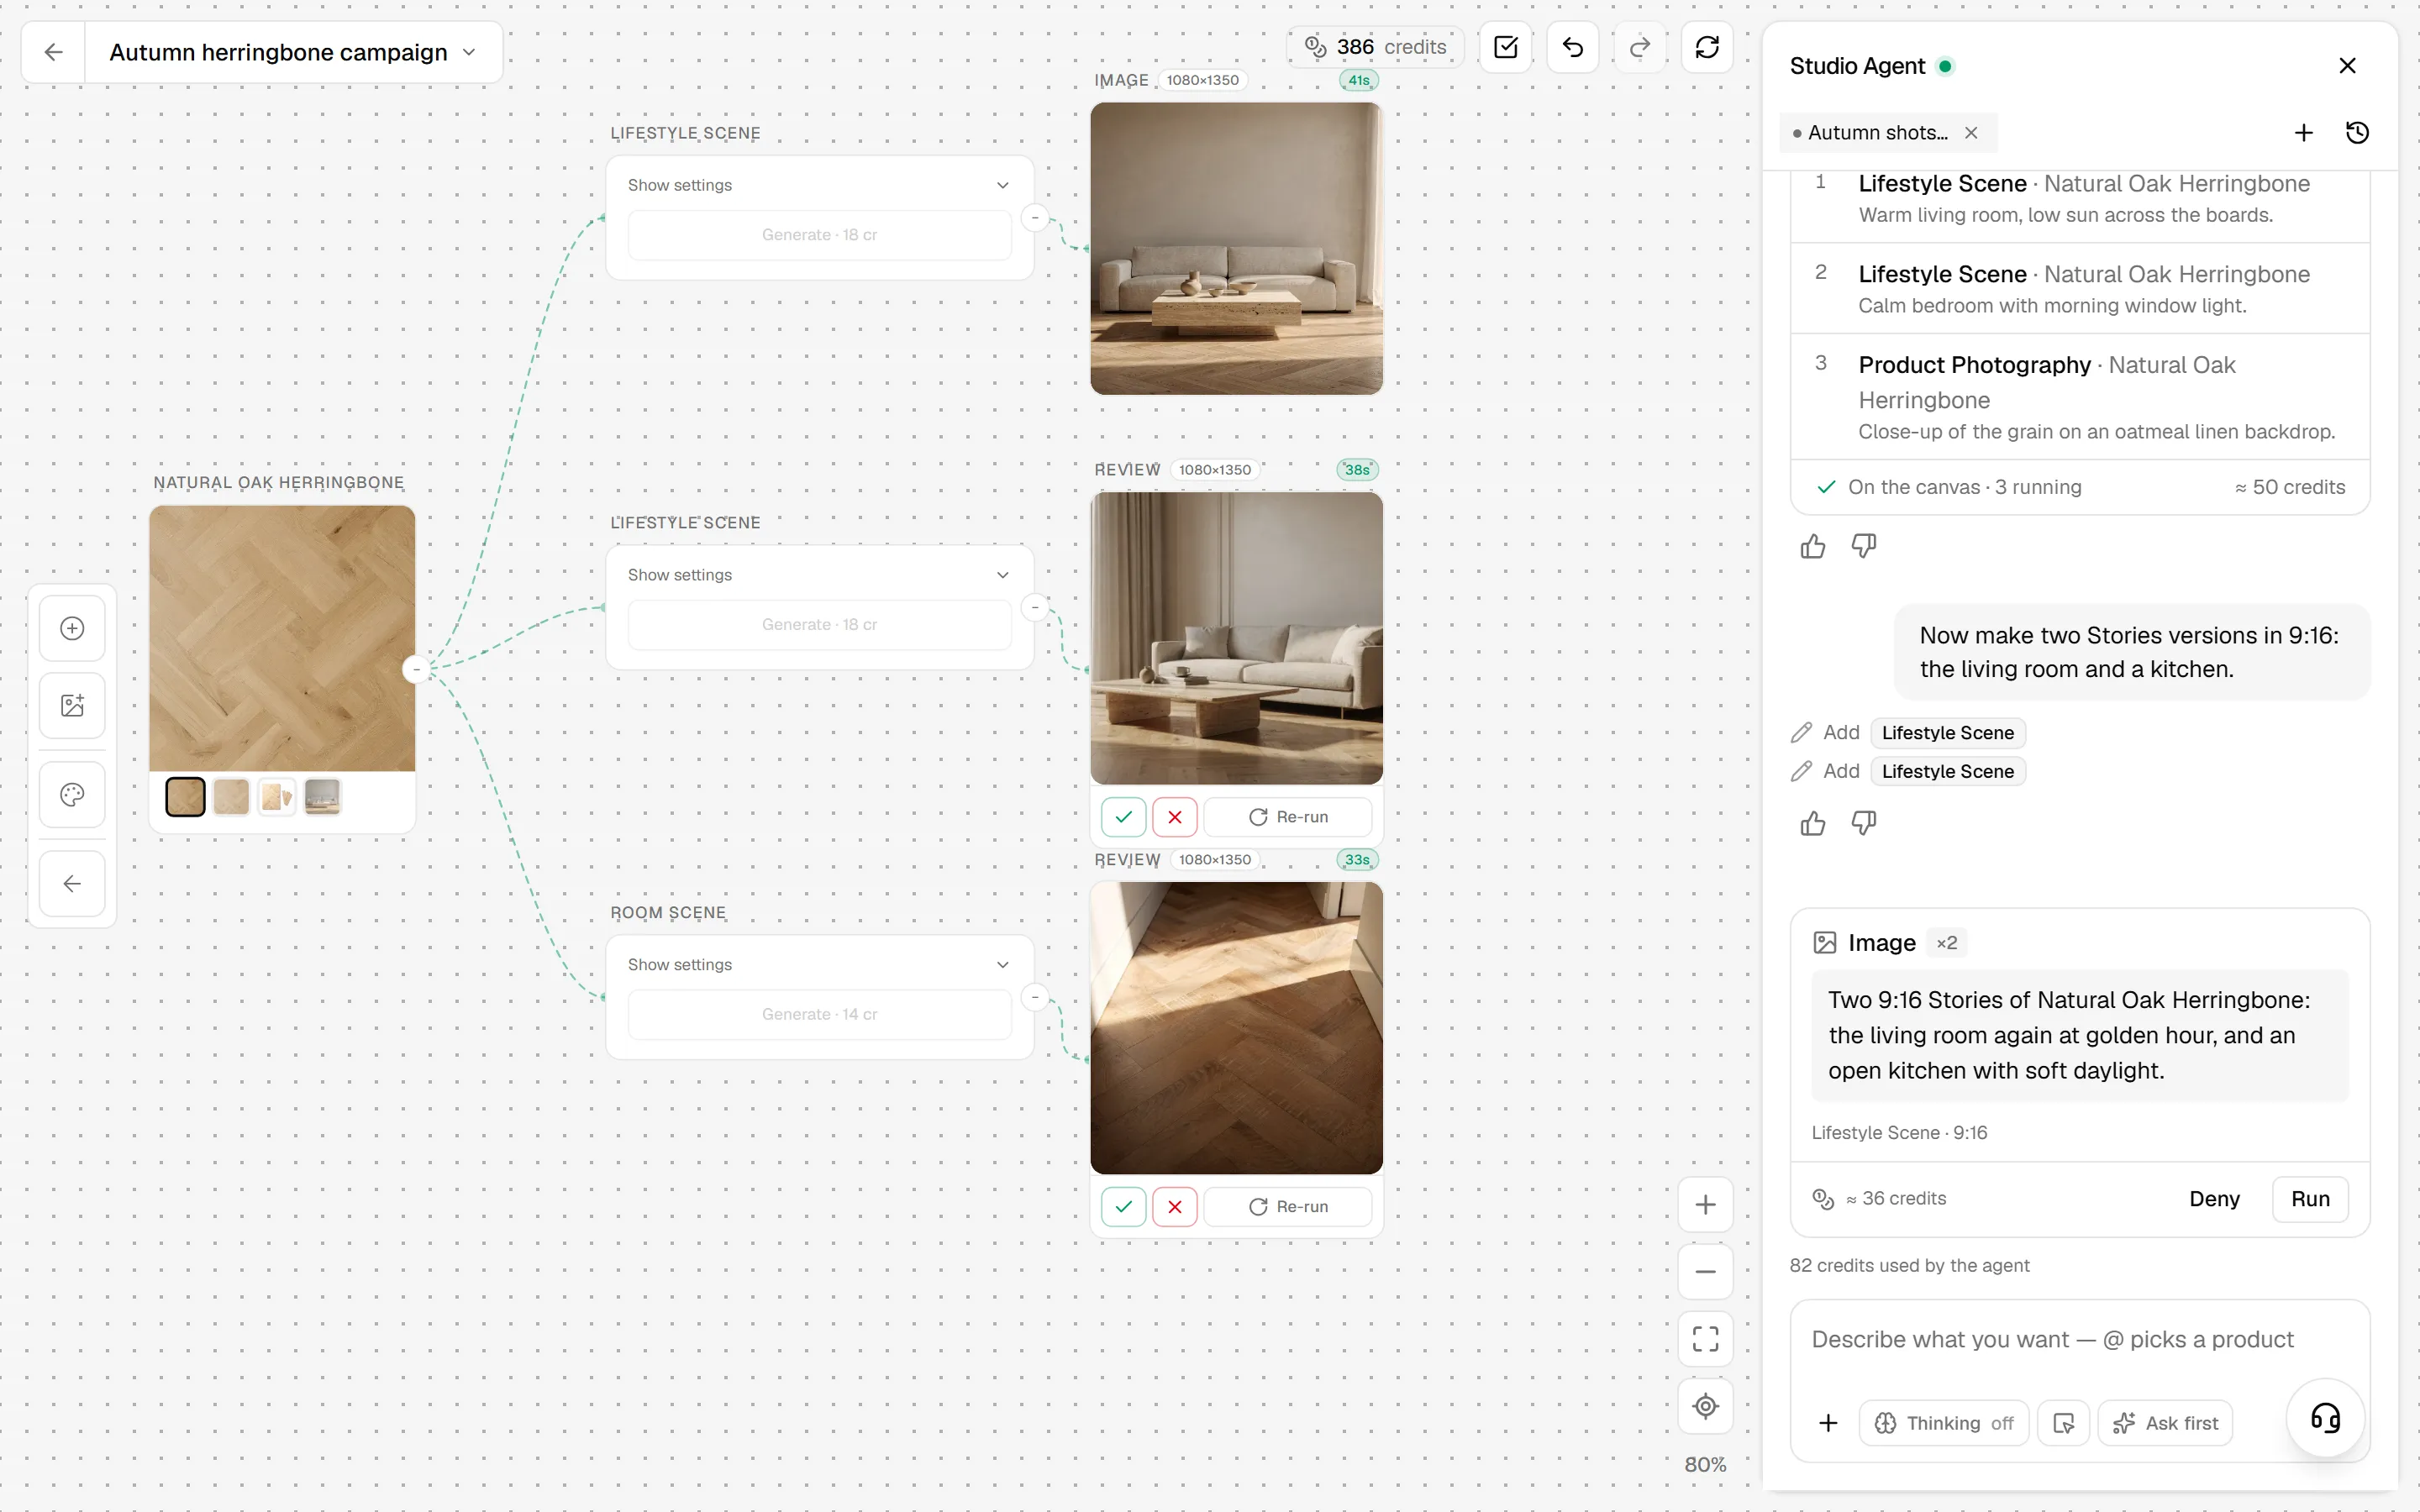
After you decide, the plan stays in the conversation as a card with its numbered steps and the agent's reason for each one. It is marked On the canvas or Turned down. The images it makes arrive on the canvas for review like any others.
How to check it worked
- Your approved images are labelled IMAGE on the canvas.
- The project card on the Content Studio list shows the new node count and today's date.
- A post you scheduled is listed under Social › Calendar in the Marketing workspace.
Common mistakes
- Starting from a weak product image. The recipes start from your product's images in the catalog. Make sure the product has a clear, well-lit image of the material.
- Approving too quickly. Check the pattern and scale before you approve. Re-run is cheaper than a post that misrepresents the product.
- Expecting the agent to post for you. The Studio Agent plans and makes images. Scheduling is always done by you, with Schedule as post on an approved image.
- Leaving the agent on Auto without meaning to. Keep Ask first while you learn, so every plan shows its estimated credits before it runs.
FAQ
How much does an image cost? Each recipe's Generate button shows its cost in credits, and the agent shows an estimate before you approve a plan. Your remaining credits are always shown at the top of the canvas.
Can I use my own reference photo? Yes. The From Reference recipe replaces an object in a reference scene with your product.
Can I make portrait versions for Stories? Yes. Ask the Studio Agent for a 9:16 version, as in the example above.
Is anything published without me? No. New images wait for your review, and posts are only scheduled when you use Schedule as post.
Next steps
Once you have a few approved images, use them across your social posts, product pages and emails. To see more of what Content Studio makes for home and interior brands, visit the Content Studio page, or compare what is included on the pricing page. If you would like a walkthrough with your own products, contact us.